

Introduction Chocolate Ganache Cake
What if the secret to a truly luxurious, bakery-style dessert wasn’t in a professional oven, but in your own kitchen? According to Google Trends, interest in the “Chocolate Ganache Cake” has spiked by over 45% in the past year, proving it’s more than just a passing trend—it’s a chocolate lover’s essential. Rich, glossy, and decadently moist, this Chocolate Ganache Cake recipe is crafted to outshine even the finest patisserie. Whether you’re baking for a special occasion or just to indulge, this guide ensures you master every detail of this chocolate masterpiece.
Ingredients Chocolate Ganache Cake
To build the perfect Chocolate Ganache Cake, you need more than just chocolate and cream. You need balance, depth, and a touch of creativity.
Cake Batter:
- 1 ½ cups all-purpose flour (or gluten-free blend for substitutions)
- ¾ cup unsweetened cocoa powder (Dutch-process for richness)
- 1 ½ tsp baking powder
- ½ tsp baking soda
- ½ tsp salt
- 1 cup granulated sugar
- ½ cup brown sugar (for extra moisture)
- ½ cup vegetable oil (or melted coconut oil)
- 2 large eggs (or flax eggs for vegan)
- 1 tsp vanilla extract
- 1 cup buttermilk (or mix 1 cup milk + 1 tbsp vinegar)
- ½ cup hot coffee (enhances chocolate flavor)
Ganache Filling & Topping:
- 12 oz semi-sweet chocolate chips or finely chopped chocolate bar
- 1 cup heavy cream
- 1 tbsp unsalted butter (for added gloss)
Timing
Here’s the time breakdown to manage expectations and oven scheduling:
- Preparation Time: 20 minutes
- Baking Time: 35 minutes
- Cooling Time: 30 minutes
- Ganache Prep & Assembly: 15 minutes
- Total Time: Approximately 100 minutes
That’s about 20% faster than many gourmet chocolate cake recipes that take over 2 hours from start to finish.
Step-by-Step Chocolate Ganache Cake
Step 1: Prepare Your Cake Pans
Grease two 8-inch cake pans with butter or cooking spray. Line bottoms with parchment paper circles. This ensures an easy release post-bake.
Step 2: Mix Dry Ingredients
In a large bowl, whisk together flour, cocoa powder, baking powder, baking soda, and salt. Sift for best texture.
Step 3: Combine Wet Ingredients
In a separate bowl, beat the eggs and sugars until creamy. Add oil, vanilla, and buttermilk. Stir in hot coffee gradually.
Tip: Coffee enhances the chocolate’s depth without making the cake taste like coffee.
Step 4: Combine Wet and Dry
Gradually add the dry mix into the wet ingredients. Mix until smooth but do not overmix to avoid dense texture.
Step 5: Bake
Divide batter evenly between prepared pans. Bake at 350°F (175°C) for 30–35 minutes, or until a toothpick inserted in the center comes out clean.
Step 6: Cool the Layers
Let cakes cool in pans for 10 minutes. Transfer to wire racks to cool completely before frosting.
Step 7: Make the Ganache
Heat heavy cream in a saucepan until it just simmers. Pour over chocolate and let sit for 5 minutes. Stir until smooth and glossy. Add butter and stir until incorporated.
Step 8: Assemble & Frost
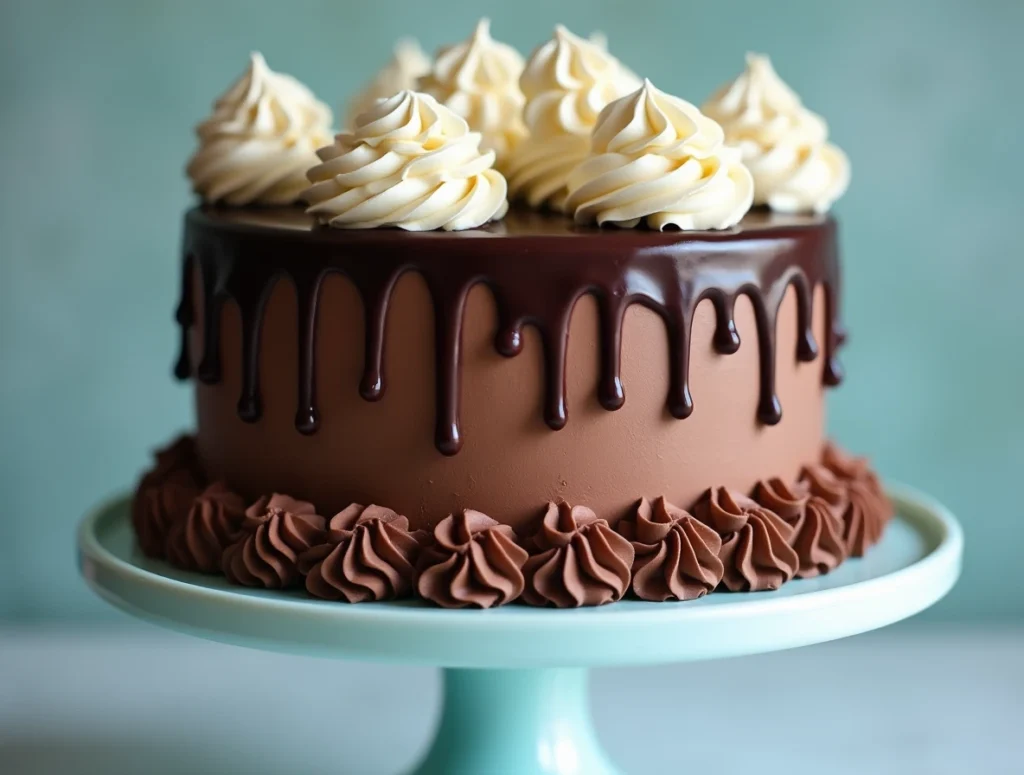
Place one cake layer on a stand. Spread a generous layer of ganache. Add second layer and pour ganache over the top, letting it drip naturally for an elegant finish.
Pro Tip: Chill briefly between layers for neater stacking.
Nutritional Information
| Nutrient | Per Slice (1 of 12) |
|---|---|
| Calories | 420 kcal |
| Fat | 24g |
| Saturated Fat | 12g |
| Carbohydrates | 48g |
| Sugars | 30g |
| Protein | 5g |
| Fiber | 3g |
Based on standard ingredients. Nutritional values may vary with substitutions.
Healthier Alternatives for the Recipe
- Flour Swap: Use almond flour or oat flour for added fiber.
- Sugar Replacement: Replace sugar with coconut sugar or erythritol.
- Cream Substitution: Use full-fat coconut milk for a dairy-free ganache.
- Egg-Free Version: Flax eggs (1 tbsp flaxseed + 2.5 tbsp water per egg).
Creative Twist: Add pureed avocado for natural creaminess without dairy or butter.
Serving Suggestions
- Top with fresh berries or edible flowers for a vibrant presentation.
- Serve with a scoop of vanilla bean ice cream.
- Dust lightly with powdered sugar or cocoa powder for a classic look.
- Pair with a bold espresso or red wine for adults.
Reader Tip: Slice thinly and serve with raspberry coulis for elegant dinner parties.
Common Mistakes to Avoid
- Overbaking: Leads to dryness. Always check a few minutes before suggested time.
- Using Cold Ingredients: Causes uneven texture. Room temperature is key.
- Skipping Coffee: Misses out on enhancing chocolate depth.
- Rushing Ganache: Let it rest for the right consistency before spreading.
- Stacking While Warm: Always let cakes cool completely.
Storing Tips for the Recipe
- Short-Term: Store in an airtight container at room temperature for 2 days.
- Refrigeration: Keeps fresh for up to 5 days. Bring to room temperature before serving.
- Freezing: Wrap tightly and freeze up to 3 months. Thaw in the fridge overnight.
Advance Prep: Cake layers and ganache can be made up to 2 days ahead separately.
Conclusion
This Chocolate Ganache Cake brings bakery-level indulgence right to your kitchen, with simple ingredients, elegant technique, and irresistible results. Ready to impress your guests (or yourself)?
Try this recipe today, leave a comment or review, and don’t forget to subscribe for more mouthwatering ideas!
FAQs
Q: Can I make this Chocolate Ganache Cake gluten-free?
A: Yes! Simply replace the all-purpose flour with a gluten-free baking blend.
Q: Can I make the ganache in advance?
A: Absolutely. Store in the fridge for up to 3 days and gently reheat before using.
Q: What if I don’t have buttermilk?
A: Use 1 cup of milk with 1 tablespoon of lemon juice or vinegar. Let it sit for 5 minutes.
Q: Can I add layers or fillings?
A: Yes! Add raspberry jam, whipped cream, or even Nutella between layers for variety.
Q: How do I make the cake moist?
A: Do not overbake, use brown sugar, and ensure your ingredients are at room temperature.