

Halloween is the season of creativity, costumes, and of course, delicious spooky treats. Among the many Halloween desserts, one that stands out as both an edible decoration and a festive activity is the Haunted Cookie House. Much like a gingerbread house during Christmas, the Haunted Cookie House brings families and friends together to design, build, and decorate something spectacularly spooky. In this guide, you’ll learn everything about building your own Halloween cookie house from scratch, from recipes for the cookie walls to decoration techniques, icing tricks, and tips for long-lasting displays. Whether you’re a seasoned baker or a Halloween enthusiast looking to try something new, this guide will walk you through every detail. By the end, you’ll have a complete Haunted Cookie House ready to become the centerpiece of your Halloween dessert table.
Why Make a Haunted Cookie House for Halloween?
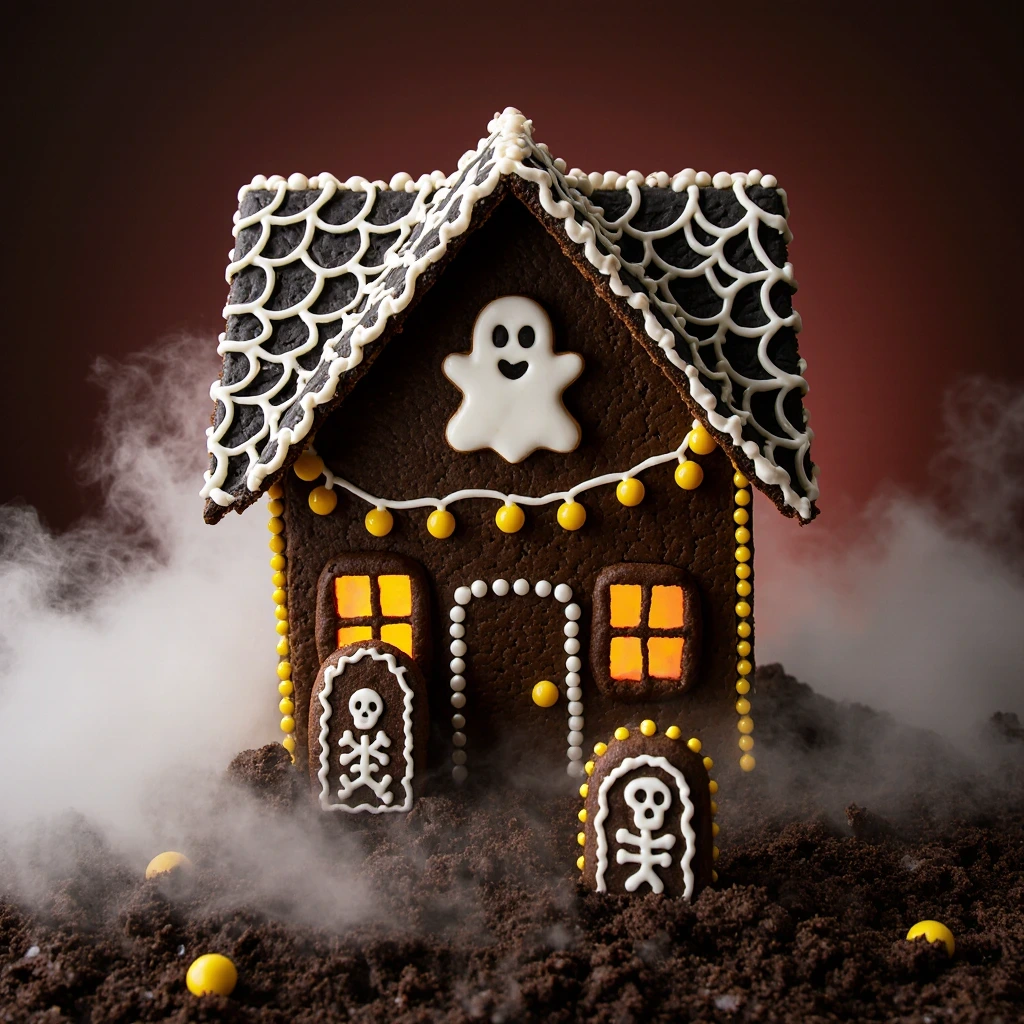
Creating a cookie house is more than just baking. It’s about bringing imagination to life and transforming simple recipes into a Halloween masterpiece. Unlike store-bought Halloween desserts, a homemade cookie house allows you to choose the flavors, colors, and overall theme. You can design a gothic haunted mansion, a playful pumpkin patch cottage, or even a creepy witch’s lair. The process itself is enjoyable—rolling dough, cutting walls, assembling pieces, and decorating with candies and icing. Beyond being a dessert, a Haunted Cookie House doubles as a Halloween decoration. Place it at the center of your table and let your guests marvel at the edible artistry before indulging in its deliciousness.
Ingredients for a Haunted Cookie House
The foundation of a successful Halloween cookie house lies in a sturdy cookie recipe and the right decorating supplies. Here’s what you’ll need:
For the Cookie Dough (House Walls and Roof):
-
3 cups all-purpose flour
-
1 teaspoon baking soda
-
½ teaspoon salt
-
2 teaspoons ground ginger (for a spiced flavor)
-
1 teaspoon cinnamon
-
1 cup unsalted butter, softened
-
1 cup granulated sugar
-
1 large egg
-
1 cup molasses or dark corn syrup (for sturdiness and deep color)
-
1 teaspoon vanilla extract
For the Royal Icing (Edible Glue):
-
3 egg whites (pasteurized) or 6 tablespoons meringue powder with water
-
4 cups powdered sugar
-
1 teaspoon lemon juice or cream of tartar
Decorating Candies and Add-Ons:
-
Candy corn for roof shingles
-
Black licorice for fences
-
Chocolate wafers for pathways
-
Mini marshmallows for ghost shapes
-
Green-tinted coconut shreds for grass
-
Jelly beans or gumdrops for colorful accents
-
Edible glitter, black sanding sugar, or Halloween sprinkles
Step-by-Step Guide to Building a Haunted Cookie House
Step 1: Prepare the Cookie Dough
Start by whisking the dry ingredients—flour, baking soda, salt, ginger, and cinnamon—in a bowl. In another bowl, cream the butter and sugar until light and fluffy, then add the egg, molasses, and vanilla. Gradually add the dry mixture until the dough forms. Chill the dough in the refrigerator for at least an hour. This ensures it’s firm enough to roll and cut into house templates.
Step 2: Create Templates for the House
Using parchment paper or cardboard, draw and cut out house templates. You’ll need two side walls, a front, a back, and two roof panels. Templates help ensure the house fits together correctly and stands upright. For extra spookiness, cut out window holes or crooked shapes to give it a haunted vibe.
Step 3: Roll and Cut the Cookie Dough
Roll the chilled dough on a floured surface to about ¼ inch thick. Place the templates on top and cut the dough with a sharp knife. Transfer the pieces to a parchment-lined baking sheet. Be sure to cut out extra cookie shapes such as tombstones, bats, and pumpkins for added decorations.
Step 4: Bake the Cookies
Preheat your oven to 350°F (175°C). Bake the cookie panels for 10–12 minutes or until firm and golden. Let them cool completely on a wire rack. Fully cooled cookies are essential for strong construction.
Step 5: Prepare the Royal Icing
Royal icing is the glue that holds your Haunted Cookie House together. Beat the egg whites or meringue powder with powdered sugar and lemon juice until stiff peaks form. Keep it covered with a damp cloth when not in use to prevent it from hardening.
Step 6: Assemble the House
On a flat surface, pipe royal icing along the edges of the walls and stick them together. Hold them in place until stable, or use cans/jars for support while they dry. Once the walls are set, add the roof panels with generous icing along the seams. Allow the structure to dry for several hours before decorating.
Step 7: Decorate the Haunted Cookie House
Now the fun begins! Use candies and icing to create a haunted effect. Line the roof with candy corn shingles. Add black licorice fences around the house. Pipe spooky spiderwebs with black icing. Place marshmallow ghosts near the door. Sprinkle edible glitter for a magical touch. The more creative, the better!
Decoration Ideas for a Haunted Cookie House
-
Gothic Mansion Theme: Use dark chocolate icing for a spooky, old-world look. Add candy skeletons and gravestones in the yard.
-
Pumpkin Patch Cottage: Decorate with orange and green candies, candy pumpkins, and leafy icing vines.
-
Witch’s House: Incorporate candy cauldrons, broomsticks made of pretzels, and gummy frogs.
-
Ghostly Graveyard: Create tombstones with rectangular cookies, pipe names in black icing, and scatter marshmallow ghosts.
Tips for a Perfect Haunted Cookie House
-
Use Thick Cookies: Thin cookies can crack easily. Keep them around ¼ inch thick.
-
Work in Sections: Let the base dry completely before adding the roof.
-
Patience with Icing: Royal icing takes time to harden, so allow hours between steps.
-
Add Support: If making a large house, insert candy canes or pretzel rods inside for structure.
-
Choose a Theme: Decide on a haunted style before decorating to keep the design cohesive.
Cookie House Variations for Halloween Desserts
If you’d like to add variety to your Halloween desserts, you can try different cookie flavors. Chocolate cookies give a darker, spookier effect. Gingerbread provides a warm, spicy flavor. Sugar cookies offer a neutral base that’s easy to color with food dye. You can also experiment with black cocoa powder for an intensely dark haunted look.
Pairing a Haunted Cookie House with Other Halloween Desserts
To make your Halloween dessert table stand out, pair the cookie house with other themed recipes. Serve spiderweb cupcakes, pumpkin pies, caramel apples, or ghost-shaped sugar cookies. This creates a cohesive theme for your party and ensures everyone has something delicious to enjoy.
How to Store Your Haunted Cookie House
If you want your cookie house to last throughout the Halloween season, keep it in a cool, dry place away from humidity. Cover loosely with plastic wrap or a large cake dome. Avoid refrigeration, as moisture can soften the cookies and ruin the decorations.
FAQs About Haunted Cookie Houses
Q1: How long does it take to make a Haunted Cookie House?
It typically takes 4–6 hours, including baking, cooling, assembling, and decorating.
Q2: Can I make the dough in advance?
Yes, cookie dough can be made 2–3 days in advance and stored in the refrigerator.
Q3: What’s the best icing for building a cookie house?
Royal icing is the best choice because it hardens like cement and provides sturdy support.
Q4: Can kids help with the project?
Absolutely! Kids can help cut shapes, assemble, and decorate. Just supervise during baking and icing steps.
Q5: How long does a Haunted Cookie House last?
If stored properly, it can last up to 2 weeks as a decoration. For eating purposes, consume within 3–4 days.
Q6: Do I need special molds for the house?
No, you can create your own cardboard or parchment paper templates for cutting shapes.
Q7: Can I use store-bought cookie dough?
Yes, pre-made dough works, but it may not be as sturdy as homemade recipes.
Q8: How do I prevent my cookie house from collapsing?
Make sure cookies are fully cooled and the icing is given enough time to set between steps.
Q9: Can I make a gluten-free Haunted Cookie House?
Yes, substitute gluten-free flour blends and ensure other ingredients are certified gluten-free.
Q10: Can I use hot glue instead of icing if it’s just for decoration?
For non-edible displays, hot glue can be used, but the house will not be edible.
Q11: What type of cookie is best for building a Halloween cookie house?
Gingerbread and spiced molasses cookies are sturdy choices. Chocolate cookies also work well for a haunted effect, while sugar cookies are best if you want to dye them with Halloween colors.
Q12: Can I use graham crackers instead of baking cookies?
Yes, graham crackers are a quick shortcut. While they may not be as sturdy as homemade cookies, they work well for smaller haunted houses or kids’ projects.
Q13: What’s the best way to cut windows and doors?
Cut windows and doors with a sharp knife before baking. For stained glass windows, place crushed hard candies in the cutouts before baking to melt into colorful panes.
Q14: Can I use chocolate instead of royal icing?
Melted chocolate works for sticking decorations but is not strong enough for structure. Stick to royal icing for construction, and use chocolate for accents and design.
Q15: How do I make my Haunted Cookie House look extra spooky?
Use dark-colored icings, edible glitter, black sanding sugar, and creepy candies like gummy worms, candy eyes, or skeleton gummies. Lighting it with a small LED candle inside also adds a spooky glow.
Q16: How can I make a mini Haunted Cookie House?
Use smaller templates or even a mug template. Mini houses are great for individual servings and can be placed on each guest’s dessert plate for Halloween parties.
Q17: Can I freeze cookie dough for later use?
Yes, cookie dough can be frozen for up to 3 months. Thaw overnight in the refrigerator before rolling and cutting into shapes.
Q18: How do I transport a Haunted Cookie House without breaking it?
Build it on a sturdy base like a wooden board or cake drum. Secure it with a little extra icing and place it in a box with padding around the edges to prevent shifting.
Q19: Can I make a Haunted Cookie House without eggs?
Yes, substitute aquafaba (chickpea water) or commercial egg replacers in both cookie dough and royal icing recipes to make them egg-free.
Q20: What food coloring works best for Halloween cookie houses?
Gel food coloring is best because it provides rich, vibrant colors without adding extra liquid that could soften icing or dough.
Q21: How can I make my Haunted Cookie House glow in the dark?
Use edible glow powders, neon-colored icing, or place a small battery-operated LED light inside the house for a glowing haunted mansion effect.
Q22: Can I build the house directly on a cake?
Yes! Place your Haunted Cookie House on top of a Halloween-themed cake for a dramatic dessert centerpiece. The cake acts as a spooky base with extra treats.
Q23: How do I make edible “slime” for my Haunted Cookie House?
Mix corn syrup with green food coloring to create slimy effects. Drip it over the roof or ooze it from windows for a spooky look.
Q24: Can I make a gluten-free Haunted Cookie House?
Yes, simply replace all-purpose flour with a gluten-free flour blend designed for baking. Ensure all candies and icing are certified gluten-free too.
Q25: What’s the difference between a gingerbread house and a Haunted Cookie House?
The concept is similar, but Haunted Cookie Houses use darker flavors, spooky colors, and Halloween-themed decorations like ghosts, bats, and pumpkins.
Q26: Can I use fondant instead of icing for decorations?
Yes, fondant works well for creating smooth textures, tombstones, bats, or ghosts. Use royal icing to glue fondant pieces to the house.
Q27: How can I make the roof look old and broken?
Break cookies into jagged shapes for shingles, or pipe black royal icing cracks. Dust with cocoa powder or black sugar for a worn-down haunted look.
Q28: What candies should I avoid when decorating?
Avoid very heavy candies, as they can collapse the roof or walls. Also, candies that melt easily in warm rooms, like soft chocolates, may cause messes.
Q29: How do I make spiderweb decorations?
Pipe thin white royal icing in circular patterns and drag a toothpick outward from the center to create a web effect. Add small candy spiders for detail.
Q30: Can I turn my Haunted Cookie House into a competition?
Yes! Host a Halloween cookie house decorating contest with friends or family. Provide each team with cookie pieces, icing, and candies, then vote for the spookiest design.
Conclusion
Making a Haunted Cookie House for Halloween is an unforgettable experience that combines baking, creativity, and festive fun. It’s more than just another Halloween dessert—it’s a centerpiece, a decoration, and a family project all in one. With the right cookie recipe, sturdy icing, and creative decorations, your haunted masterpiece will be both spooktacular and delicious. This Halloween, skip the store-bought desserts and embrace the joy of crafting your very own Haunted Cookie House.