

Prep Time: 10 minutes
Cook Time: 35-40 minutes
Total Time: 45-50 minutes
Servings: 4
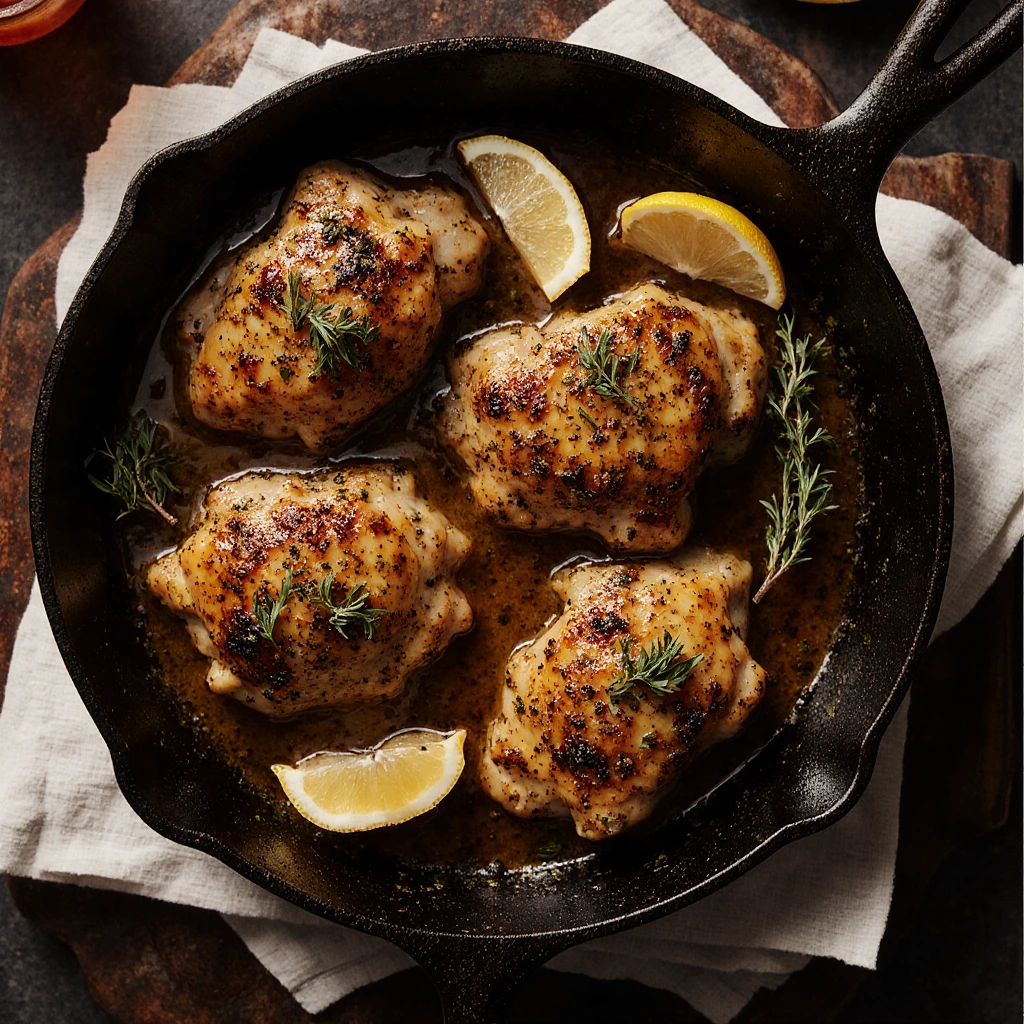
There are some recipes that just feel like a warm hug after a long day, and this Baked Honey Dijon Chicken is absolutely one of them. I stumbled upon this combination years ago when I was trying to jazz up a weeknight dinner, and it’s been a staple in my kitchen ever since. The sweet honey pairs beautifully with the tangy Dijon mustard, creating this incredible glaze that caramelizes in the oven and makes your whole house smell amazing. Whether you’re cooking for picky eaters, hosting friends, or just want something delicious without spending hours in the kitchen, this recipe has your back.
Ingredients for the Best Baked Honey Dijon Chicken
For the Chicken:
- 4-6 bone-in, skin-on chicken thighs (or 4 chicken breasts)
- 2 tablespoons olive oil
- Salt and pepper to taste
- 1 teaspoon garlic powder
- ½ teaspoon paprika
For the Honey Dijon Glaze:
- ¼ cup Dijon mustard
- 3 tablespoons honey
- 2 tablespoons olive oil
- 2 cloves garlic, minced
- 1 tablespoon apple cider vinegar (or lemon juice)
- 1 teaspoon dried thyme (or rosemary)
- ½ teaspoon black pepper
- ¼ teaspoon salt
Optional Garnish:
- Fresh parsley or thyme
- Lemon wedges
Step-by-Step Baked Honey Dijon Chicken Instructions
Step 1: Preheat and Prep
Preheat your oven to 400°F (200°C). While it’s heating up, pat your chicken pieces completely dry with paper towels—this is key for getting crispy skin! Season both sides generously with salt, pepper, garlic powder, and paprika.
Step 2: Make the Glaze
In a small bowl, whisk together the Dijon mustard, honey, olive oil, minced garlic, apple cider vinegar, thyme, pepper, and salt until well combined. The mixture should be smooth and glossy. Set aside about 2 tablespoons of glaze for basting later.
Step 3: Sear the Chicken (Optional but Recommended)
Heat 2 tablespoons of olive oil in an oven-safe skillet over medium-high heat. Place chicken skin-side down and sear for 3-4 minutes until golden brown. Flip and sear the other side for 2 minutes. This step adds extra flavor and crispiness, but you can skip it if you’re short on time.
Step 4: Apply the Glaze
Brush the honey Dijon glaze generously over the chicken pieces, making sure to coat them well. If you didn’t sear the chicken, arrange it in a baking dish and then apply the glaze.
Step 5: Bake
Transfer the skillet (or baking dish) to the preheated oven. Bake for 30-35 minutes, or until the internal temperature reaches 165°F (74°C) when checked with a meat thermometer. Halfway through, brush with the reserved glaze for extra flavor.
Step 6: Broil for Extra Crispiness (Optional)
If you want an extra caramelized, crispy finish, turn on the broiler for the last 2-3 minutes. Watch it closely so it doesn’t burn!
Step 7: Rest and Serve
Remove from the oven and let the chicken rest for 5 minutes. This helps keep the juices locked in. Garnish with fresh herbs and serve with your favorite sides—roasted vegetables, mashed potatoes, or a simple salad all work beautifully.
Key Ingredients & Substitutions
Dijon Mustard: This is the star of the show, providing that signature tangy flavor. If you don’t have Dijon, you can use whole grain mustard for a slightly different texture, or even yellow mustard in a pinch (though it’ll be milder). Stone-ground mustard also works wonderfully.
Honey: The sweetness balances the mustard perfectly. If you’re avoiding refined sugars, maple syrup or agave nectar make excellent substitutes. For a less sweet version, reduce the honey to 2 tablespoons.
Chicken Thighs vs. Breasts: I prefer bone-in, skin-on thighs because they stay juicier and more flavorful, but chicken breasts work too. Just reduce the cooking time to about 25-30 minutes and watch the temperature carefully so they don’t dry out. Boneless, skinless pieces cook even faster (20-25 minutes).
Apple Cider Vinegar: This adds a subtle tanginess that brightens up the glaze. Lemon juice, white wine vinegar, or even balsamic vinegar work as alternatives.
Herbs: Dried thyme is my go-to, but rosemary, oregano, or herbes de Provence all taste amazing. Fresh herbs are great too—just use about three times the amount since fresh herbs are less concentrated.
Tips for Tender, Juicy Chicken with Crispy Skin
Pat It Dry: This is non-negotiable if you want crispy skin. Moisture is the enemy of crispiness, so use paper towels to thoroughly dry the chicken before seasoning.
Make Shallow Slashes: Use a sharp knife to make a few shallow cuts in the thickest parts of the chicken. This helps the glaze penetrate deeper and ensures more even cooking.
Don’t Overcrowd: Whether you’re using a skillet or baking dish, give each piece of chicken some breathing room. Overcrowding creates steam, which prevents browning.
Use a Meat Thermometer: The most reliable way to avoid dry chicken is to cook to temperature, not time. Pull the chicken when it reaches 165°F—it might look slightly underdone, but it’ll finish cooking as it rests.
Let It Rest: Always let your chicken rest for 5 minutes after baking. This allows the juices to redistribute throughout the meat instead of running out onto your cutting board.
Optional Broiling: If your skin isn’t as crispy as you’d like, a quick 2-3 minutes under the broiler works wonders. Just watch it like a hawk because the sugars in the honey can burn quickly.
Equipment You’ll Need
Oven-Safe Skillet or Baking Dish: A cast-iron skillet is perfect because you can sear and bake in the same pan, but any 9×13-inch baking dish works great too. Just skip the searing step.
Meat Thermometer: Honestly, this is a game-changer. It takes the guesswork out of cooking chicken and ensures perfectly juicy results every time.
Mixing Bowl and Whisk: For combining the glaze ingredients smoothly. A fork works in a pinch, but a whisk gets everything incorporated better.
Basting Brush: Makes it easy to apply the glaze evenly. If you don’t have one, a spoon works, or you can even use a folded paper towel to dab the glaze on.
Paper Towels: Essential for drying the chicken. Don’t skip this step!
Sharp Knife: For mincing garlic and making slashes in the chicken.
Flavor Variations & Add-Ins
Garlic Herb Butter Finish: After baking, brush the chicken with melted butter mixed with minced garlic and fresh herbs. It adds an incredible richness.
Spicy Kick: Add a teaspoon of sriracha, hot sauce, or red pepper flakes to the glaze for some heat. The sweetness of the honey balances it beautifully.
Citrus Twist: Add the zest of one lemon or orange to the glaze, and squeeze some fresh citrus over the chicken before serving. It brightens everything up.
Asian-Inspired Version: Replace the thyme with fresh ginger, add a splash of soy sauce to the glaze, and garnish with sesame seeds and green onions.
Add Vegetables: Toss Brussels sprouts, baby potatoes, or green beans in olive oil and arrange them around the chicken in the baking dish. They’ll roast in the delicious drippings.
Bacon Wrapped: Wrap each chicken piece with a slice of bacon before glazing. The bacon gets crispy and adds a smoky flavor that’s absolutely incredible.
Make It Creamy: After baking the chicken, remove it from the pan and place the pan on the stovetop over medium heat. Add ½ cup of heavy cream to the pan drippings and simmer for 2-3 minutes to create a creamy sauce to drizzle over the chicken.
Frequently Asked Questions
Can I use frozen chicken?
Yes, but you’ll need to thaw it completely first. The safest way is to thaw it in the refrigerator overnight. In a pinch, you can use the cold water method: seal the chicken in a plastic bag and submerge it in cold water, changing the water every 30 minutes until thawed. Never cook chicken from frozen as it won’t cook evenly, and patting it dry (which is crucial for crispy skin) is impossible with frozen chicken.
How do I meal prep this recipe?
This recipe is fantastic for meal prep! You can marinate the chicken in the glaze for up to 24 hours before cooking, which actually makes it even more flavorful. Alternatively, bake the chicken fully, let it cool, and store it in airtight containers in the fridge for up to 4 days. Reheat in a 350°F oven for about 15 minutes until warmed through. The glaze may not be quite as crispy after reheating, but it’s still delicious. You can also freeze cooked chicken for up to 3 months—thaw overnight in the fridge before reheating.
How should I store leftovers?
Store leftover chicken in an airtight container in the refrigerator for up to 4 days. To keep the skin from getting too soggy, you can store it with a paper towel underneath to absorb excess moisture. Reheat in the oven at 350°F for the best results, or in the microwave if you’re in a hurry (though the skin won’t be as crispy). The chicken is also delicious cold—I love slicing it up for salads or sandwiches the next day!
What should I serve with Baked Honey Dijon Chicken?
This chicken pairs beautifully with so many sides! My favorites include roasted vegetables (broccoli, carrots, or asparagus), garlic mashed potatoes, rice pilaf, or a simple green salad with a light vinaigrette. For a heartier meal, try it with roasted sweet potatoes or a creamy risotto. The pan drippings also make an amazing sauce to drizzle over whatever sides you choose—don’t let that liquid gold go to waste!